Creating a delete animation using Expression Blend
27 Apr 2011 by Nigel SampsonThe email app on Windows Phone 7 has slick delete animation whenever you delete a single email, the whole page shrinks in size and then falls of the bottom of the page, once I’d seen it I knew I wanted to bring a similar animation to To Do Today. Here’s how I created it in Blend.
While the UI for Blend is great for laying up my pages on the phone it’s a little difficult to work with animations using the default layout. Thankfully Blend has the concept of Workspaces, if you go to the Window / Workspaces menu and select Animation Blend will rearrange the user interface to better deal with things like timelines.
The first thing we do create the storyboard, under the storyboard section select the New button and then give the storyboard a name, I’m calling mine AnimateDelete (original I know).
Once the storyboard is created Blend is in record mode, anything we do to our page is recorded as part of the storyboard.
To animate the entire page we’ll be manipulating the element LayoutRoot, so locate that in the Objects tree. The first step is to create a keyframe on the timeline about half a second in, this will be the frame where we’ve finished shrinking the page and start the drop. Move the timeline marker out to half a second into the timeline and hit the record keyframe button.

With that keyframe selected set the Scale transform to 0.5 to halve the size of the page. We then create the keyframe to tell the animation when to stop the drop. At around a second into the timeline create a second keyframe and with that selected set the Translate Y transform to 600.
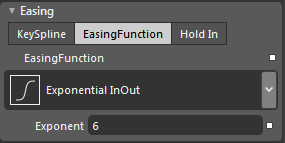
To make the animations feel a little more fluid lets set some easing functions to both keyframes. Select each keyframe and in the properties panel set the easing function to ExponentialInOut with an exponent of 6.
You can preview the animation using the timeline and tweak the values to suit your own taste.
Now lets plug the animation into the page, I have an event handler for the delete button on the application bar, we’ll use the method I created in a previous blog post to call the Delete method on the view model when the animation is complete. If we didn’t do this then our business logic would complete so quickly we wouldn’t see the animation.
private void OnDeleteAll(object sender, EventArgs e)
{
    AnimateDelete.Begin(ViewModel.DeleteAll);
}
Hope this helps some people get an idea how easy adding animation to your apps can be.


