Quick Mail
27 Jan 2012 by Nigel Sampson Repeatedly sending the same emails? this app will help. We cover in this tutorial saving data to IsolatedStorage, using the ApplicationBar, navigating between pages and file IO using Linq to Xml.
Setup
Before jumping into the tutorials head to developer.windowsphone.com to download the free tools and get them installed.
Initially I was building this application as a speed dial app, but the current integration Choosers and Tasks for this made the app pretty much useless. Our application will store mail templates (subject and body) and let us quickly send out that template, great for “I’m running late” style emails.
This app covers quite a few new concepts, the first we’ll talk about is Isolated Storage, this is primarily the only access your application has to the file system on the phone, the storage for each application is isolated from each other, so you can’t load files saved by other applications etc.
One thing to note during development is that every time you close the emulator isolated storage is wiped, so if you’re wanting to test storage make sure you don’t accidentily close it.
Isolated storage provides us with streams to read and write files which means we have a lot of flexibility with how we’ll store the data. For this appliation we’ll use Linq to Xml, so the first thing we’ll need to do is add an reference to System.Xml.Linq. We can then start building our TemplateStorage class, this will handle all our access to Isolated storage so the rest of the application doesn’t need to worry about it. It only has two methods of note, GetItems to read the xml and generate our items, and SaveChanges to write our item list back to xml.
public class TemplateStorage
{
    private IList<QuickMailTemplate> templates;
    private const string Filename = "template-list.xml";

    protected IList<QuickMailTemplate> Templates
    {
        get
        {
            return templates ?? (templates = LoadTemplates().ToList());
        }
        set
        {
            templates = value;
        }
    }

    protected IEnumerable<QuickMailTemplate> LoadTemplates()
    {
        using(var applicationStorage = IsolatedStorageFile.GetUserStoreForApplication())
        {
            if(!applicationStorage.FileExists(Filename))
                return Enumerable.Empty<QuickMailTemplate>();

            using(var speedListFile = applicationStorage.OpenFile(Filename, FileMode.Open, FileAccess.Read))
            {
                var document = XDocument.Load(speedListFile);

                return from t in document.Root.Elements("template")
                        select new QuickMailTemplate
                        {
                            Id = new Guid(t.Attribute("id").Value),
                            Subject = t.Attribute("subject").Value,
                            Body = t.Attribute("body").Value
                        };
            }
        }
    }

    public IEnumerable<QuickMailTemplate> GetItems()
    {
        return Templates;
    }

    public void Save(QuickMailTemplate template)
    {
        Templates.Add(template);
    }

    public void Delete(QuickMailTemplate template)
    {
        Templates.Remove(template);
    }

    public void SaveChanges()
    {
        using(var applicationStorage = IsolatedStorageFile.GetUserStoreForApplication())
        using(var speedListFile = applicationStorage.OpenFile(Filename, FileMode.Create, FileAccess.Write))
        {
            var document = new XDocument(new XDeclaration("1.0", "utf-8", "yes"),
                new XElement("templates",
                    from t in Templates
                    select new XElement("template",
                        new XAttribute("id", t.Id),
                        new XAttribute("subject", t.Subject),
                        new XAttribute("body", t.Body))));

            document.Save(speedListFile);
        }
    }
}
Our main page will have a list of the templates and a button to add a new template. So we’ll add a ListBox to the page and use our new TemplateStorage class to populate it. The template to display the template is really simple, just a TextBlock.
private readonly TemplateStorage storage = new TemplateStorage();

public MainPage()
{
    InitializeComponent();

    Loaded += OnLoaded;
}

private void OnLoaded(object sender, RoutedEventArgs e)
{
    Templates.ItemsSource = storage.GetItems();
}
<ListBox x:Name="Templates" SelectionChanged="OnSelectionChanged">
    <ListBox.ItemTemplate>
        <DataTemplate>
            <TextBlock Text="{Binding Subject}" Style="{StaticResource PhoneTextLargeStyle}" />
        </DataTemplate>
    </ListBox.ItemTemplate>
</ListBox>
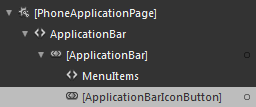
For this app we’ll use the Application Bar, this is a common UI element that controls a group of icons and a menu at the bottom of the screen. I found the best way to manage the application bar is using Expression Blend, so right click on MainPage.xaml and select “Open in Expression Blend”. Once that’s loaded select the PhoneApplicationPage in the object pane and find it’s ApplicationBar property. Hit “New” to create a new application bar, now on the objects panel right click on the Application Bar and select “Add ApplicationBarIconButton”. You can then modify the properties of the icon button and select the icon, this has a built in list of icons which will be embedded into your xap. We’ll call ours “add” and select the Add icon.
Now that we have our application bar we’ll attach a method named OnAdd to the click event of the icon button. In that method we’ll Navigate to a new page using the NavigationSerivce of PhoneApplicationPage.
<phone:PhoneApplicationPage.ApplicationBar>
    <shell:ApplicationBar>
        <shell:ApplicationBarIconButton IconUri="/icons/appbar.add.rest.png" Text="add" Click="OnAdd"/>
    </shell:ApplicationBar>
</phone:PhoneApplicationPage.ApplicationBar>
Silverlight on the Windows Phone 7 uses a page navigation metaphor for all it’s applications, this really is baked in with the hardware back button so trying to fight this will only bring pain. Just like the web we use uri’s and query strings to refer to other pages. The uri is pretty simple for what we need, things that often catch me out is the starting ‘/’ and ensuring I set UriKind.Relative. For adding a new email template we’ll navigate to the page “EditPage.xaml” so the uri is “/EditPage.xaml”. Calling the Navigate method will have phone load the new xaml page and set it as the current page. The NavigationService property of the page provides a wealth of different functionality so I highly recommend looking into it in detail.
private void OnAdd(object sender, EventArgs e)
{
    NavigationService.Navigate(new Uri("/EditPage.xaml", UriKind.Relative));
}
Creating our edit page is easy, select the project and add new item selecting new Portrait of Landscape page depending on your preference. The UI for this page is simple, couple of text boxes and a save and cancel application button icons. Cancel will navigate back to our main page, Save will have our details to storage and then Navigate to a third Details page. Just like on the web we can determine which template we’re editing (if any) by examining the query string through the NavigationContext property. We’ll abstract that behind a property named TemplateId.
private Guid? TemplateId
{
    get
    {
        if(!NavigationContext.QueryString.ContainsKey("Id"))
            return null;

        return new Guid(NavigationContext.QueryString["Id"]);
    }
}
private void OnSave(object sender, EventArgs e)
{
    QuickMailTemplate template;

    if(TemplateId == null)
    {
        template = new QuickMailTemplate
        {
            Id = Guid.NewGuid(),
            Subject = Subject.Text,
            Body = Body.Text
        };

        storage.Save(template);
    }
    else
    {
        template = storage.GetItems()
            .Single(t => t.Id == TemplateId);

        template.Subject = Subject.Text;
        template.Body = Body.Text;
    }

    storage.SaveChanges();

    NavigationService.Navigate(new Uri("/DetailsPage.xaml?Id=" + template.Id, UriKind.Relative));
}
The details page displays the template and provides application bar item to send, edit, delete and cancel, it contains very similar code to the edit page but also used the EmailComposeTask to send the email. If you’re interested in the code check out the download.
Download the Code
The code for all the tutorials is available to download: Windows Phone 7 Tutorials Solution.


